Phone Pouch Crochet Pattern | Free Crochet Pattern
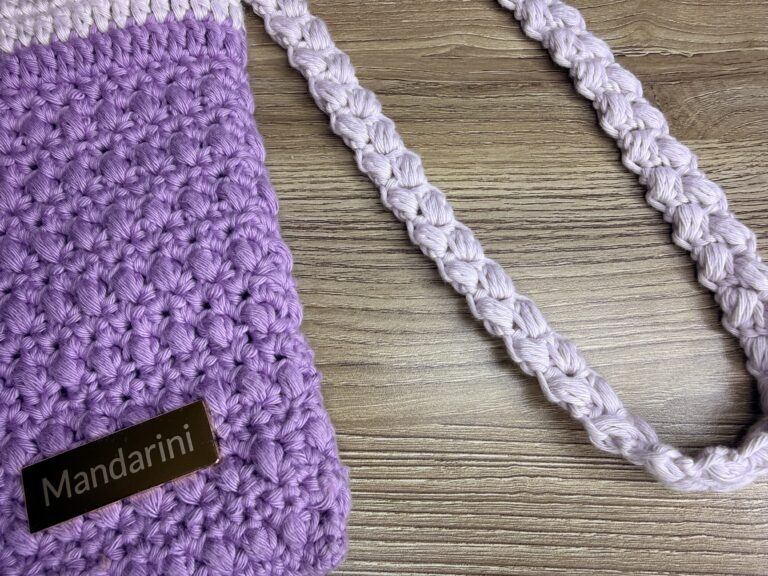
Put this Phone Pouch Crochet pattern on your calendar as a weekend project. I love this pattern because the stitches make it look like a luxury item.
This pattern requires a bit more attention to detail but the end look is so worth it!
Supplies Needed for Phone Pouch Crochet Pattern
- Worsted weight cotton yarn. 2 colors.
- 3.0 crochet hook
- stitch marker
- 14mm magnetic snap button
- jump rings for strap
OPTIONAL
- branding hardware
Abbreviations for Phone Pouch Crochet Pattern
Ch – chain
st – Stitch
SL ST – slip stitch
SC: single crochet
HDC – half double crochet
DC – double crochet
BS – bean stitch – learn how to BS below
How to make a Bean Stitch
The bean stitch is typically meant to be repeated but for this pattern, I decided to do a single round of bean stitches then switching it up.
The bean stitch is very similar to the puff stitch, but requires less yarn and is smaller in appearance.
First, you’ll insert your hook into the stitch, yarn over and pull up a loop. You’ll have 2 loops on your hook.
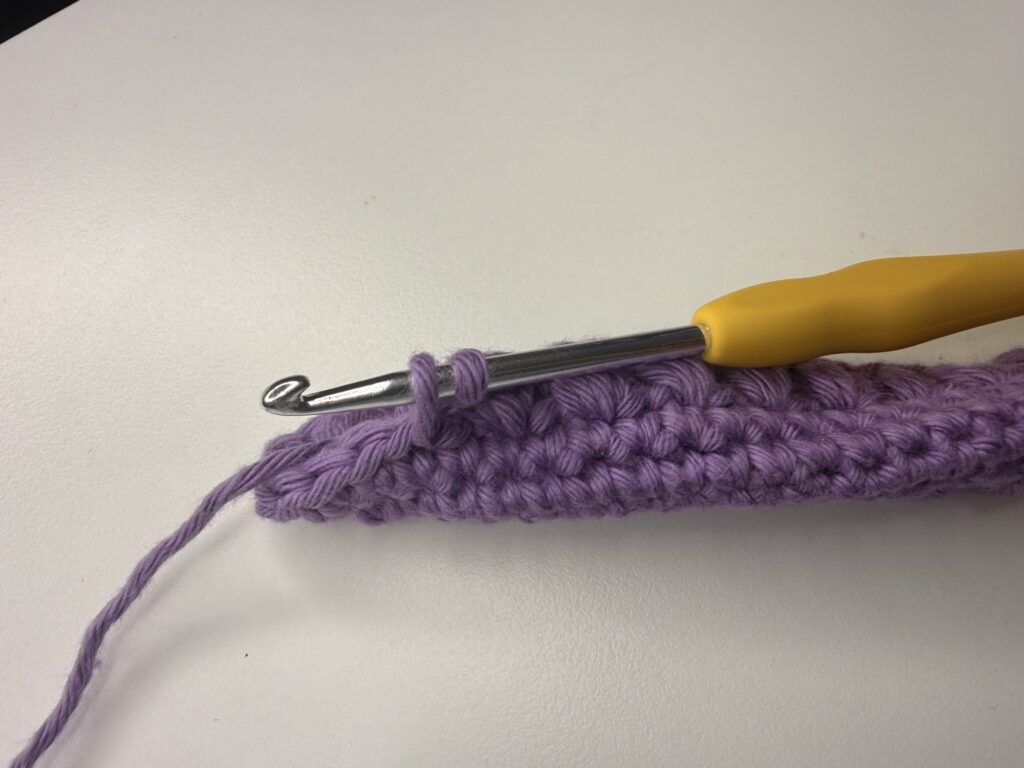
Next, Yarn over insert your hook into the stitch and pull up a loop. You’ll have 4 loops on your hook.
Then, Yarn over one more time insert your hook into the same stitch again and pull up another loop. You’ll have 6 loops on your hook.
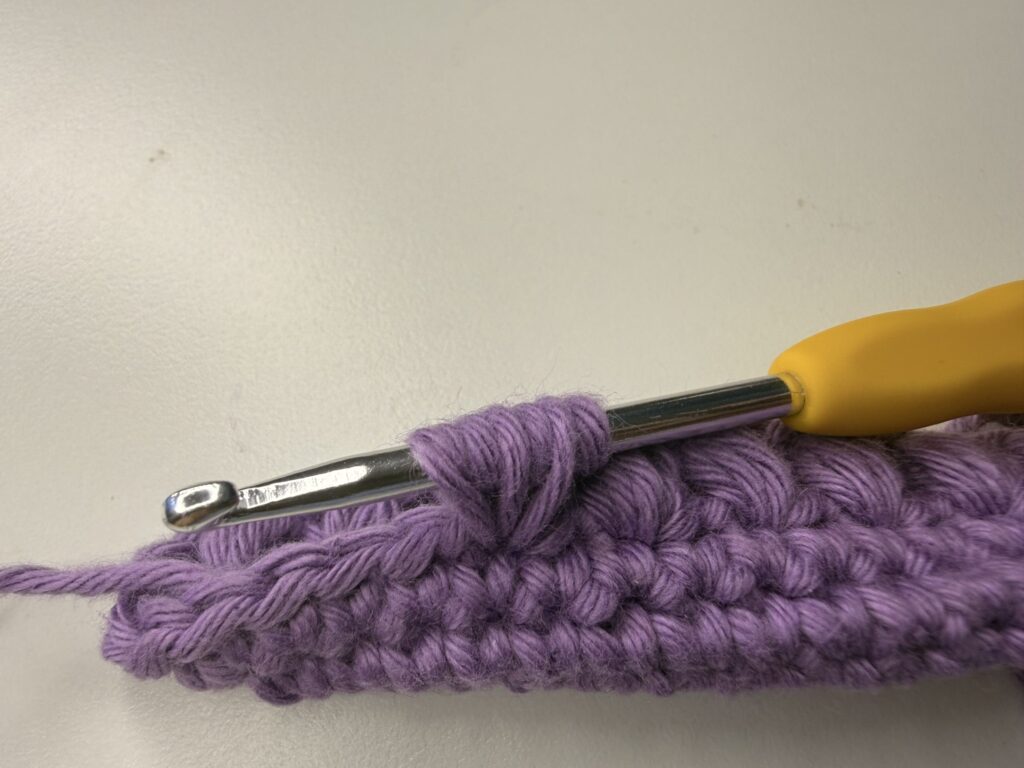
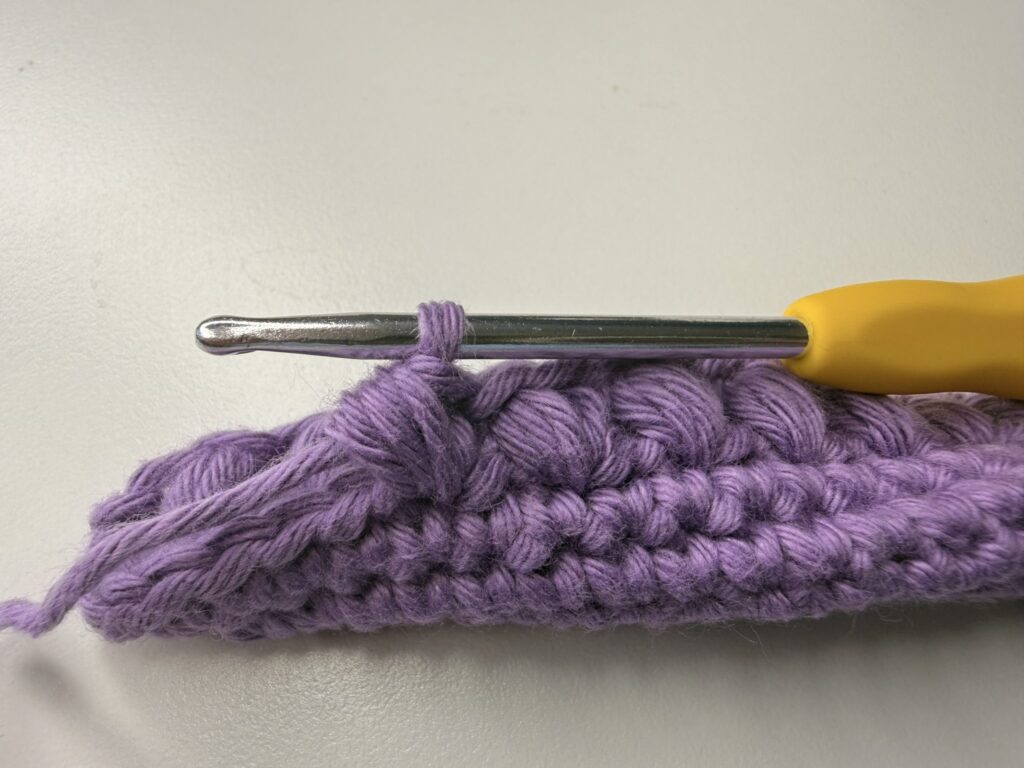
Finally, Yarn over and pull through all 6 loops. Chain one to finish off the stitch.
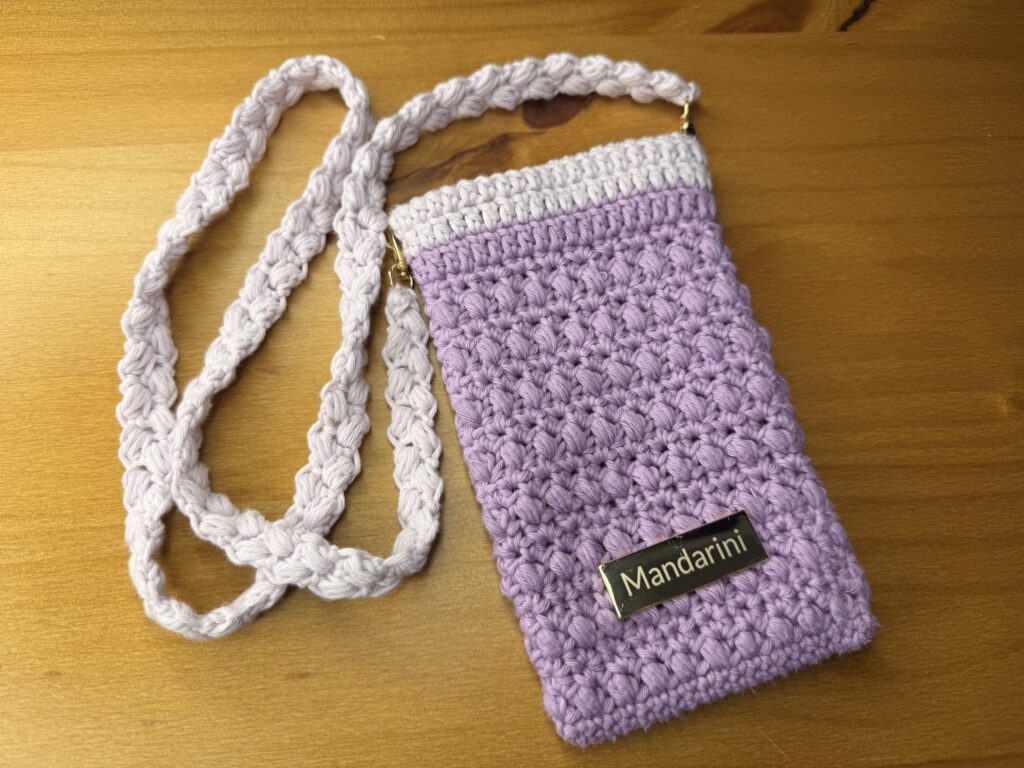
Phone Pouch Crochet Pattern
TIP: Use stitch markers so you can keep up with each round
Ch 21 to start.
Rnd 1: In the second chain from the hook, crochet 19 SC. In the last CH, make 2 SC. Continue the round by placing one SC in each CH until you reach the initial CH. Make 1 additional SC in the last Ch. You should have 40 SC in the round.
Rnd 2: Make one SC in each st.
Rnd 3: CH 2. Make BS in the first st then skip a stitch and make another BS. Continue this pattern all the way around. SL ST into the space in the first st of the rnd.
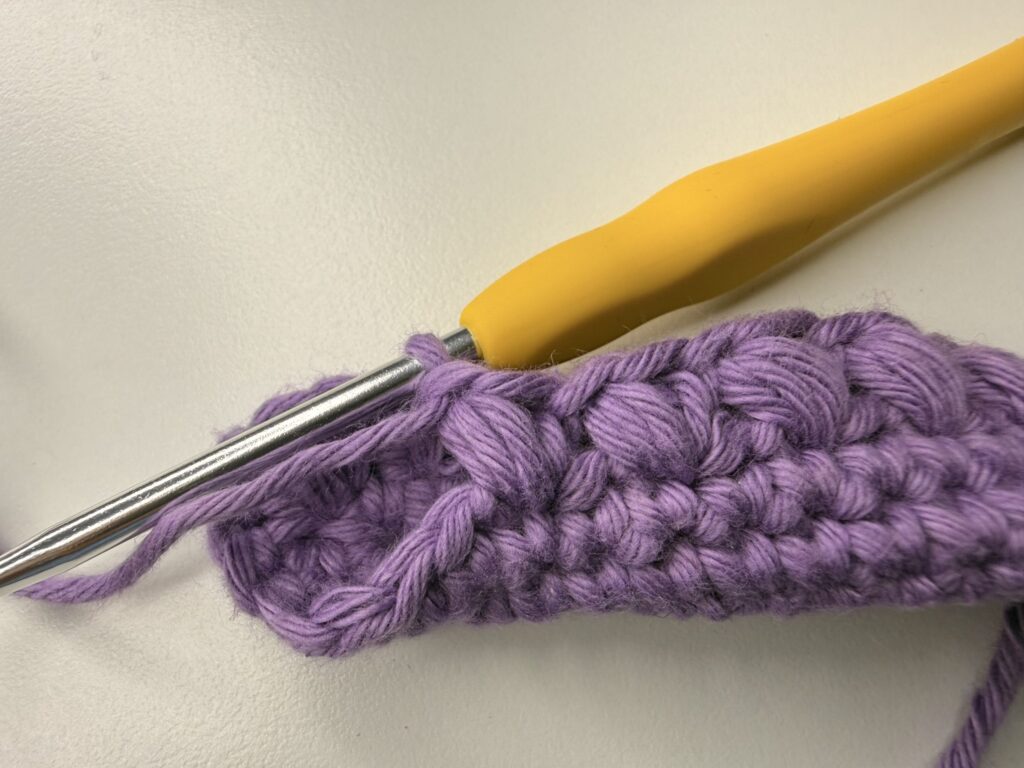
Rnd 4: In the same stitch as the SL ST make a (HDC, SC). Then skip the next stitch (the top of the bean stitch) and make another (HDC, SC). Repeat this until the end of the rnd. SL ST into the first stitch of the rnd.
Rnd 5: In the same stitch as the SL ST make a (SC, HDC). Essentially we are just reversing the order from above. Note: (SC, DC) combo should be going in the skipped stitch space. Repeat this until the end of the rnd. SL ST in the first st to finish off the rnd.
Repeat Rnds 3-5 7x.
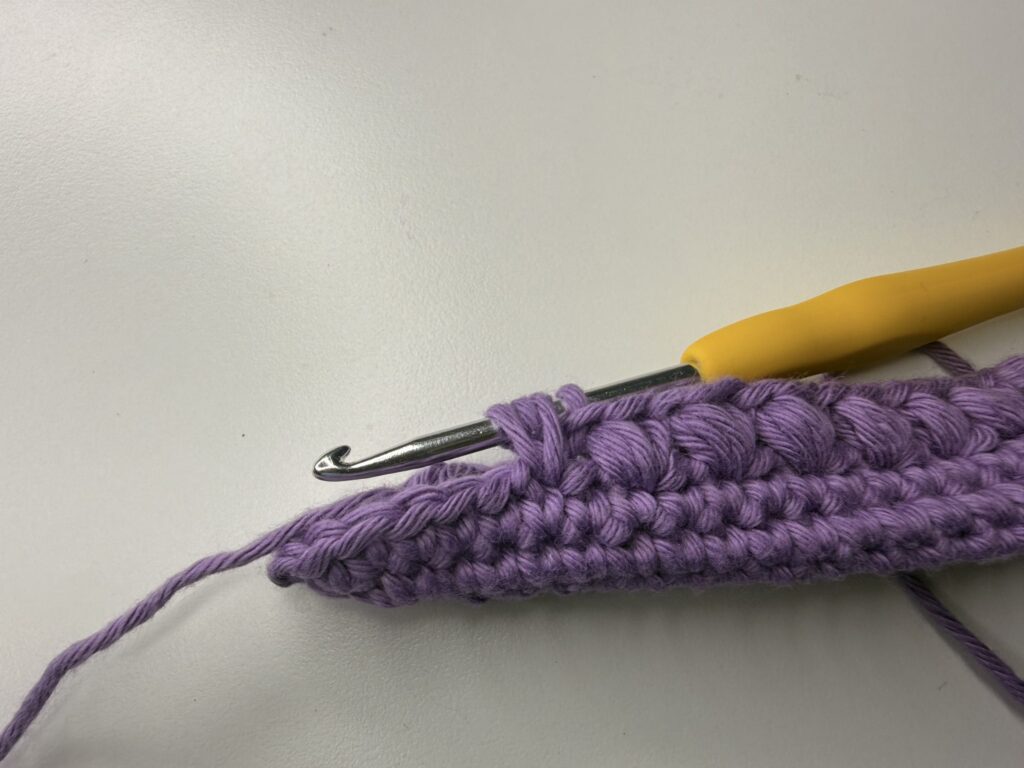
Rnd 25: CH 2, then make a DC in each stitch.
Rnd 26 – 29: CHANGE YARN COLOR – CH 2 then DC in each stitch.
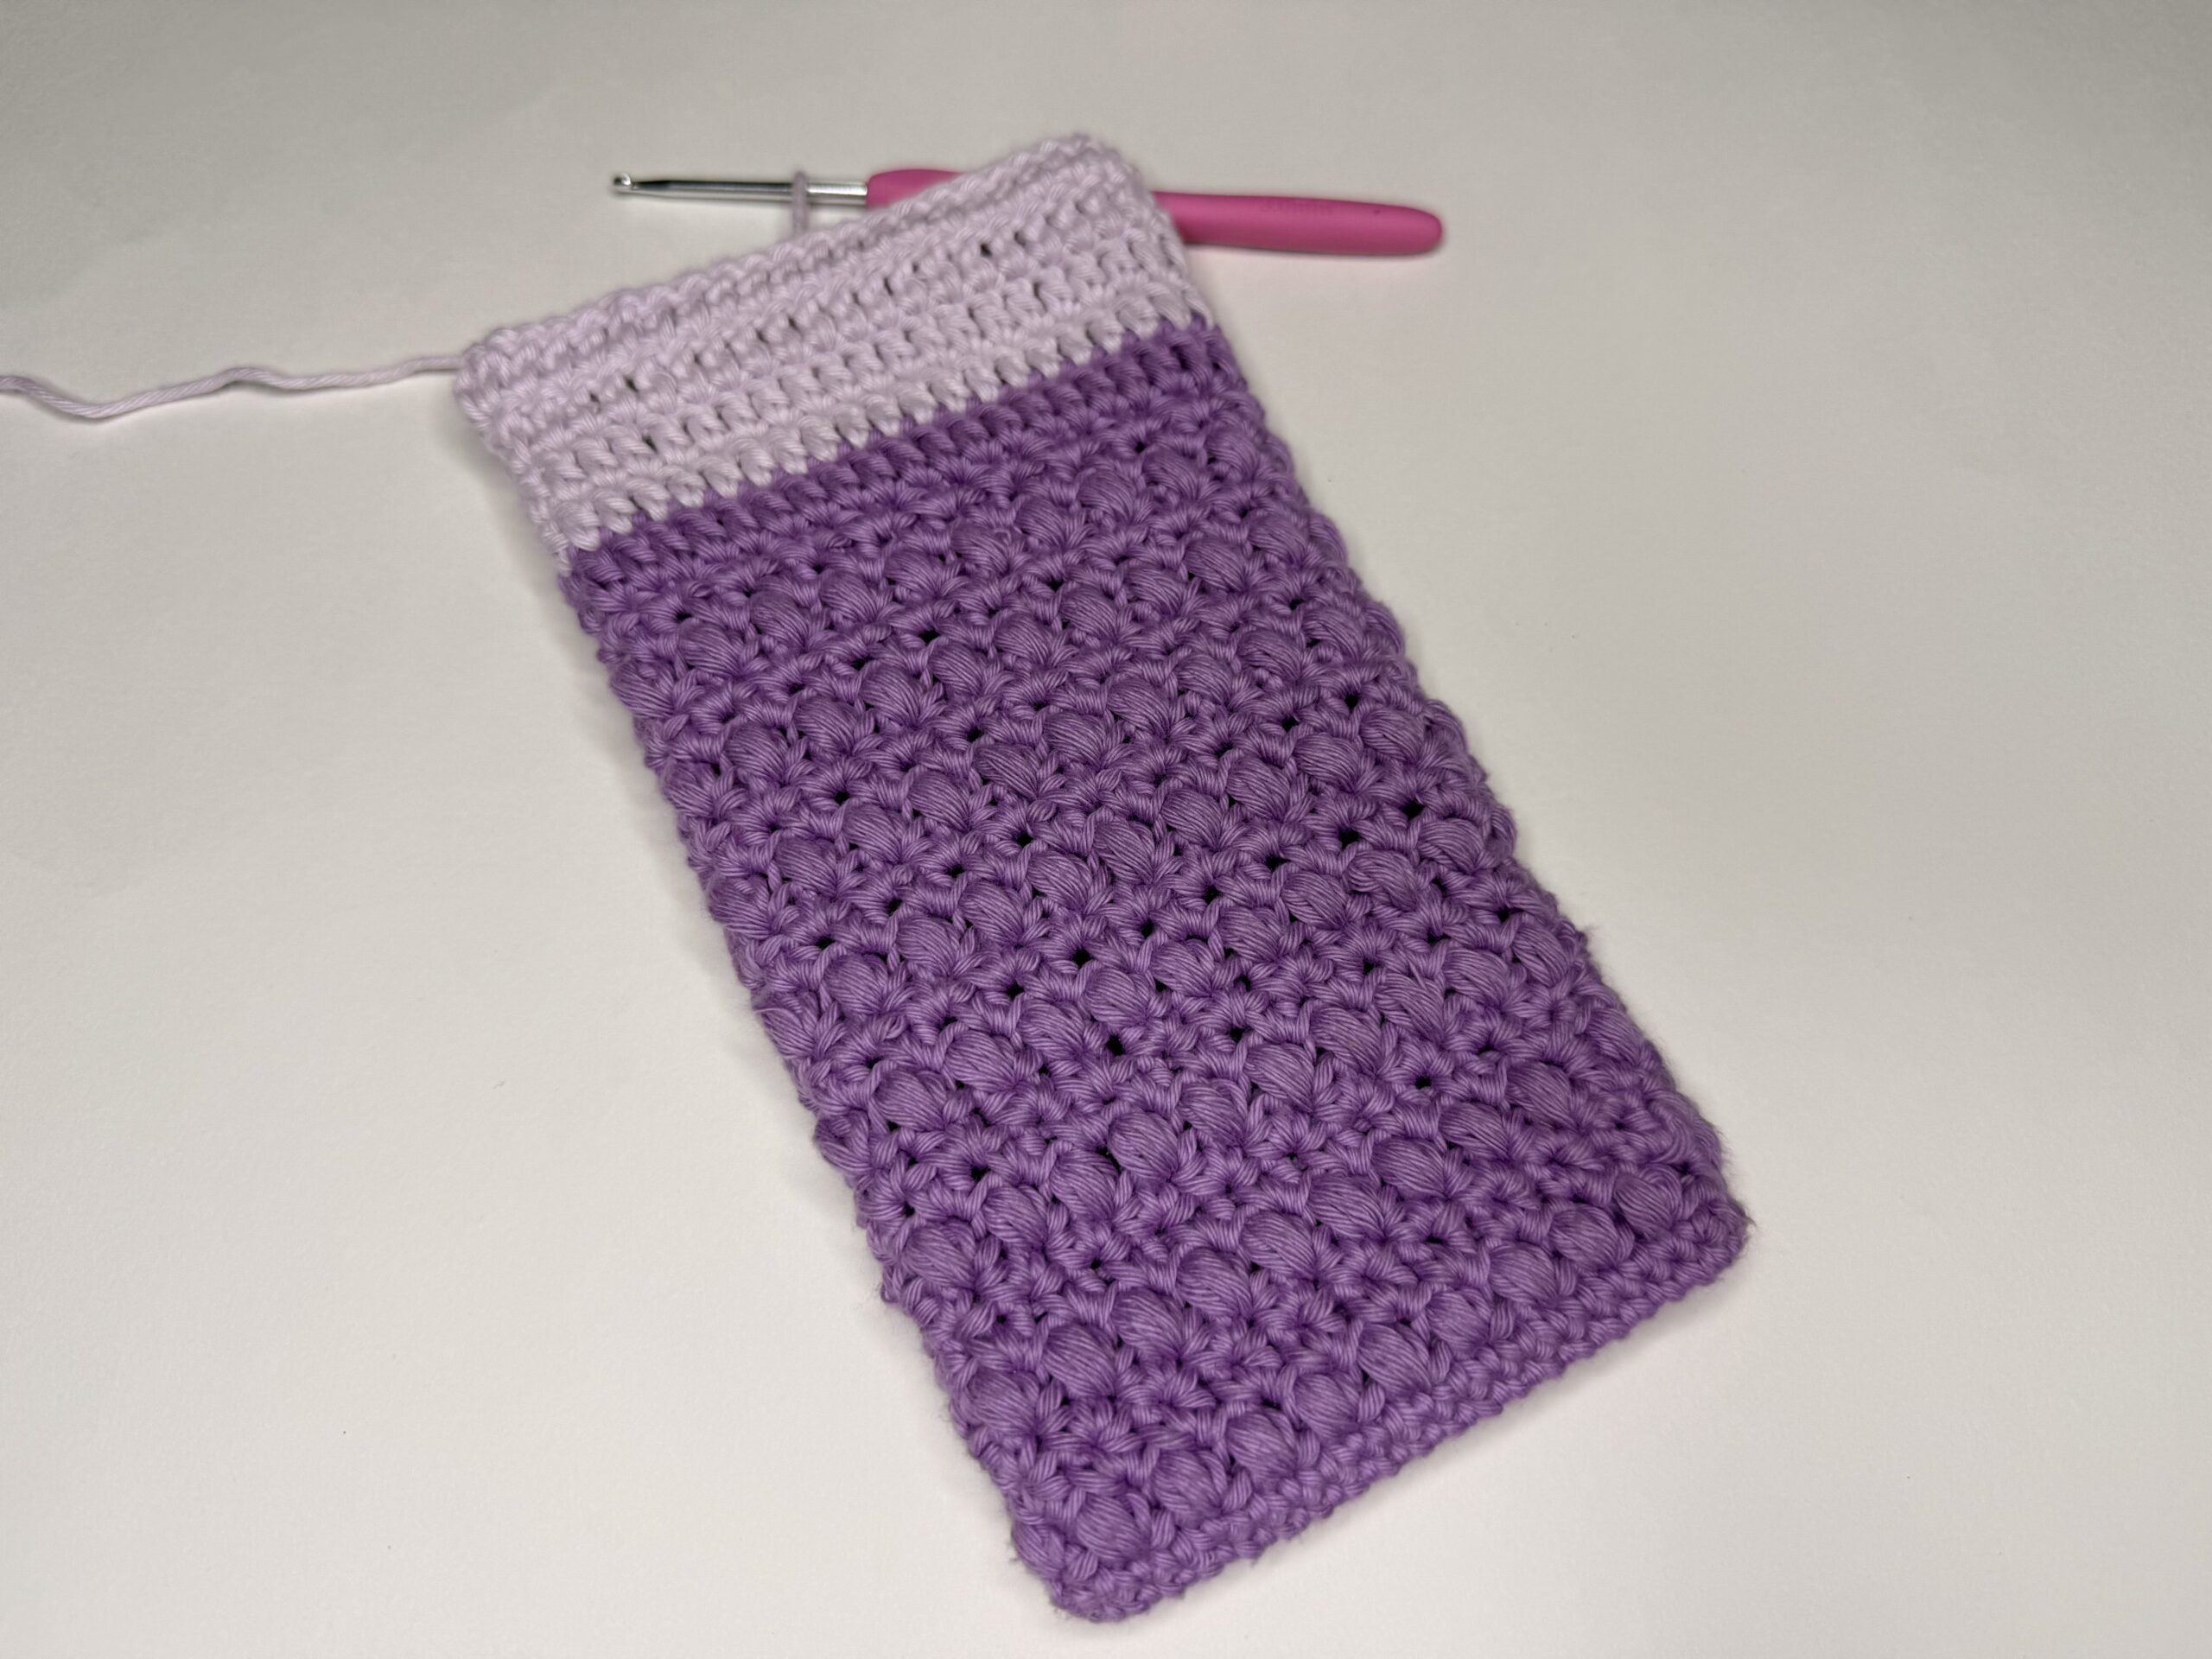
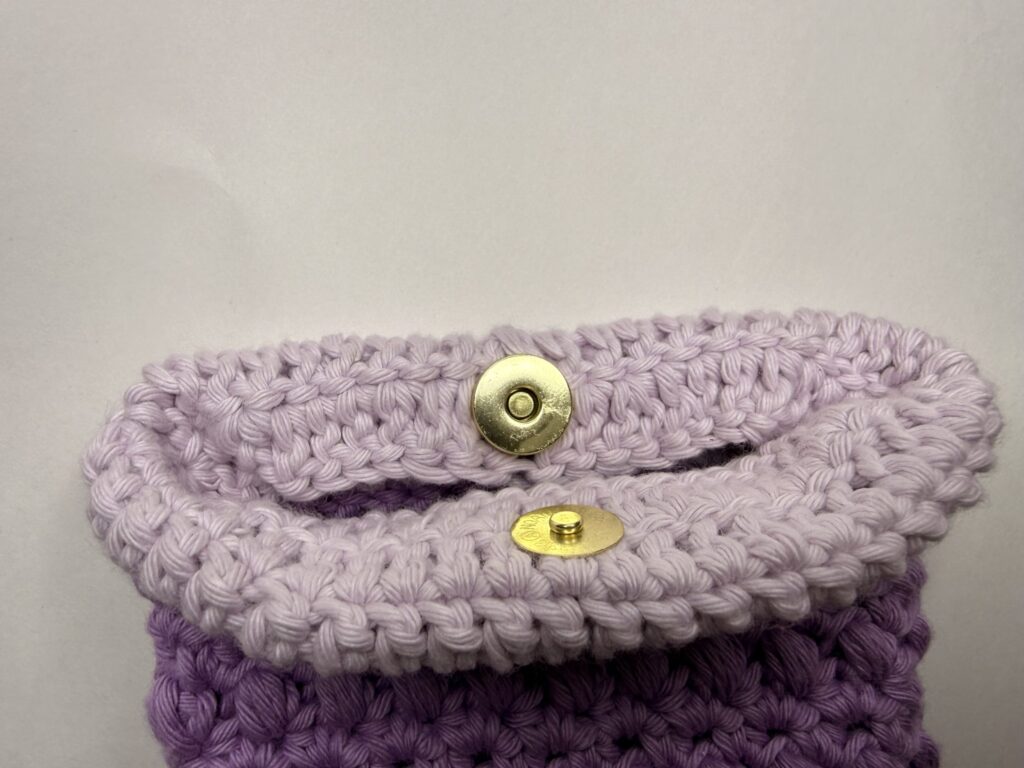
Fold the last two rows of the double crochet over and and place your 14mm magnetic buttons as shown below.
Optional Phone Pouch Crochet Hardware
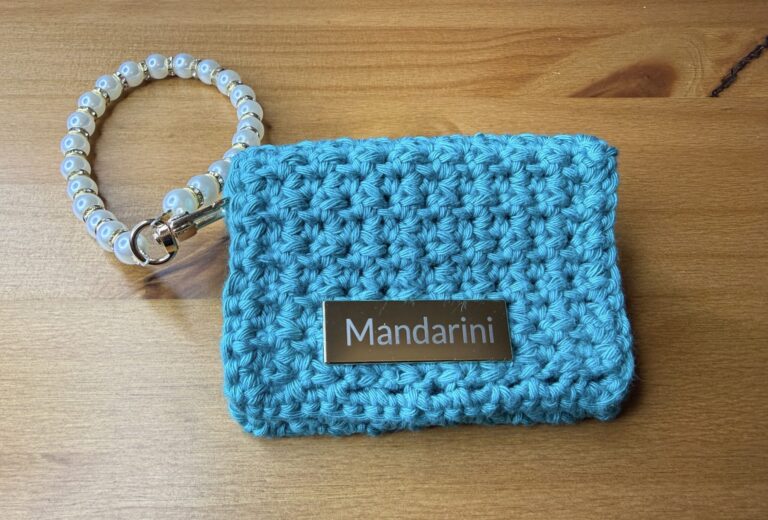
Add your branding hardware by positioning it in the middle and clamping it down with needle nose pliers.
You’ll also want to add jump rings on either side of the pouch to attach your strap. I recommend taking a look at this Free Bean Stitch Strap Pattern to pair with this pouch.
Hope you enjoyed this Free Phone Pouch Crochet Pattern!