How To Add Magnetic Prong Snap Buttons to Crochet Project
Does anyone else impulse buy like me only to realize you bought wrong thing?
I found the cutest project online that I wanted to try only to realize I bought prong buttons instead of sew on buttons. I hate the hassle of returning things, so I decided that I was going to make it work.
I prefer adding magnetic buttons to my project because I feel like they give it a more luxurious look. Its also just easier to deal with than traditional loop and button closure.
Check out some of the methods I came up with below!
Abbreviations/Terms
MC – magic circle
st/s – stitch/es
SC- single crochet
INC – increase
SL ST – slip stitich
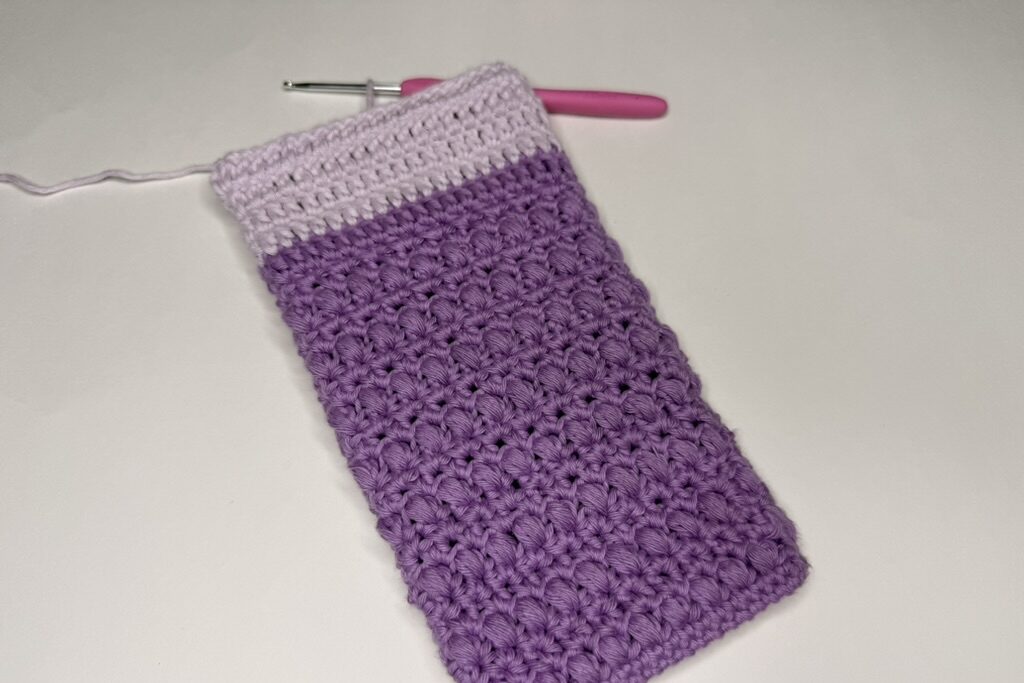
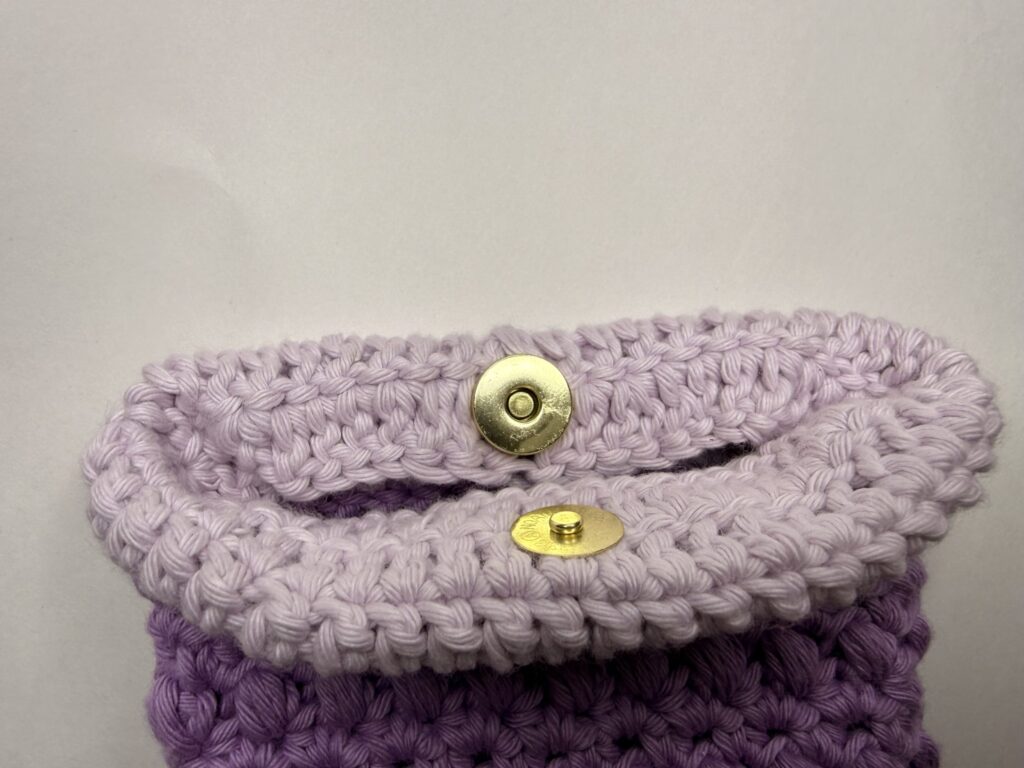
1: Fold Over Method
I love the fold over method because it doesn’t require a needle and thread but it does require crocheting a phone more rounds into your project to accommodate the button.
In my opinion this only works if you have stitches that are sturdy enough to hold a button.
For a stitch height of a SC, I recommend adding 4 more rows.
For a stitch height of a DC, I recommend adding 2 more rows.
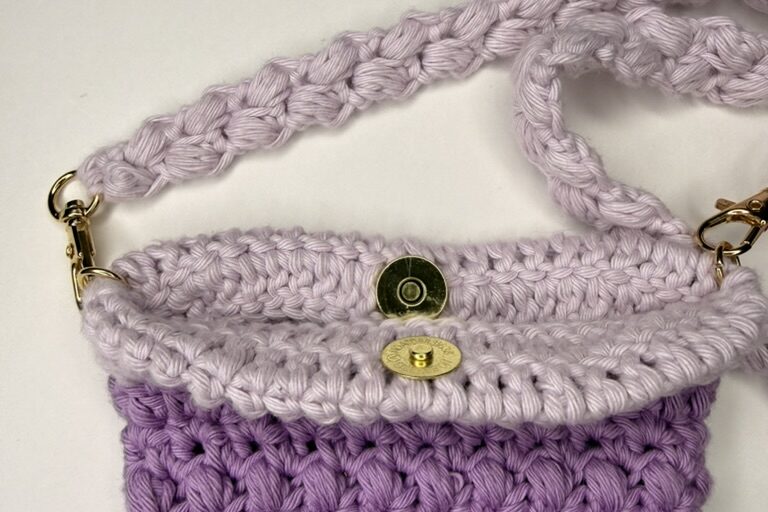
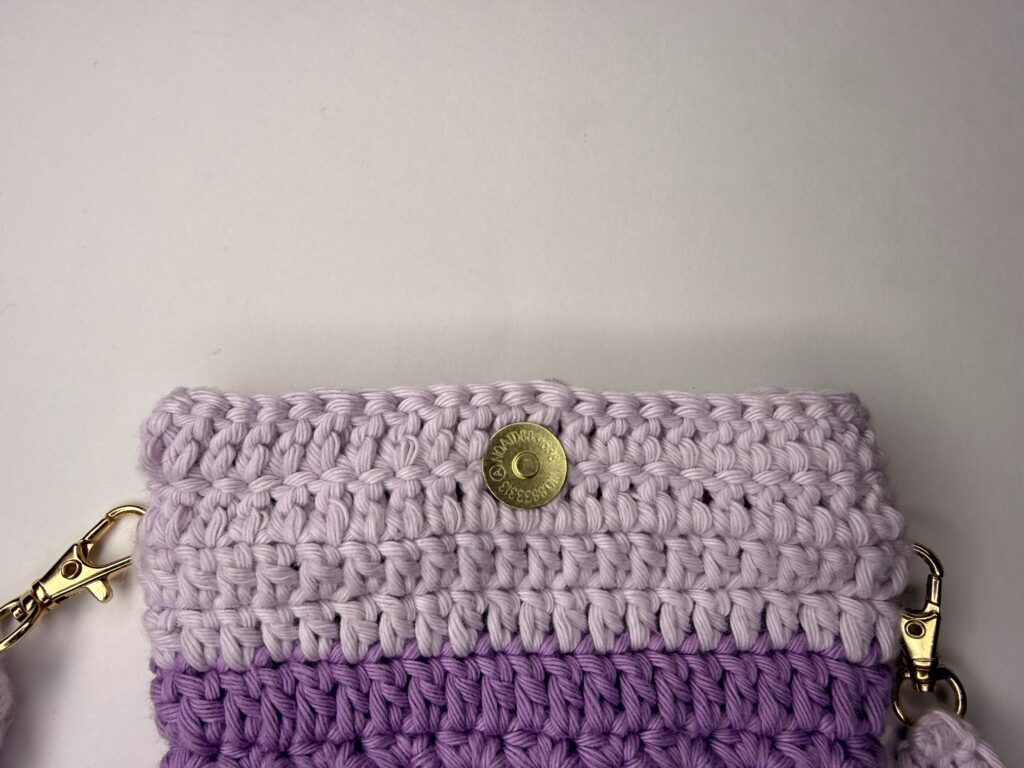
Once you’ve added your extra rows, you’ll simply attach the magnetic snap prong buttons facing outward. The backs of the buttons will be on the inside of the project facing each other.
Finally, you’ll just fold over your project and snap the buttons together.
You can also sew down the folded over part if you’d like.
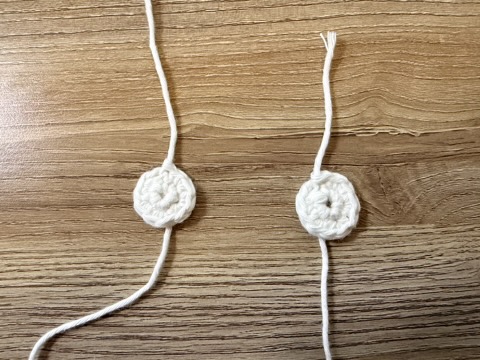
2: Sew On Method
If your project doesn’t allow you to add extra rows to fold-over, then I recommend the sew on method.
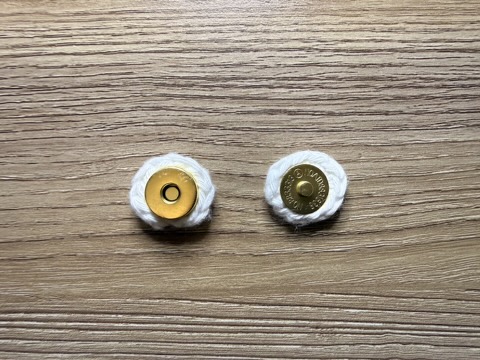
This method involves making a small circle with SC’s to attach the magnetic snap button to. Then you’ll sew the button on to the project with regular needle and thread.
You’ll want to make sure that you have thread that matches your project as closely as possible.
I also recommend using a lighter weight yarn if you have it available so that it doesn’t add additional unnecessary bulk.
For a 14mm button:
Start with a MC
Rnd 1: 5 SC into the MC. SL ST in the first stitch
Rnd 2: INC in each stitch. SL ST in the first stitch of the round to finish.
Insert the prongs of the button into the circle and clamp it on using the
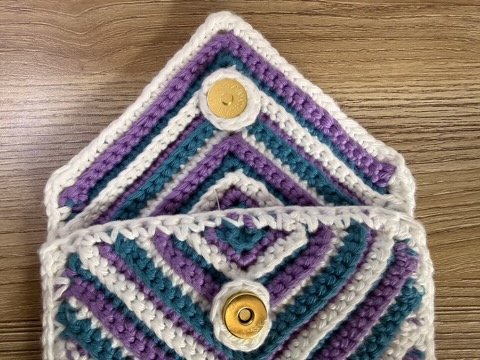
Attaching Magnetic Prong Snap Buttons
Place your buttons on your project to get an idea of where they need to go. You can mark the project using a stitch marker for the exact placement.
Next, just grab your needle and thread to sew the button on. Make sure you securely attach the button by sewing all around the circle you crocheted.
I hope these options have helped you get your magnetic snap prong buttons attached to your project!