Easy Crochet Card Holder | Free Crochet Pattern
If you’re looking for a cute and easy project to tackle, take a look at this easy crochet card holder pattern! This project is great for holding ID cards, gift cards, or credit cards.
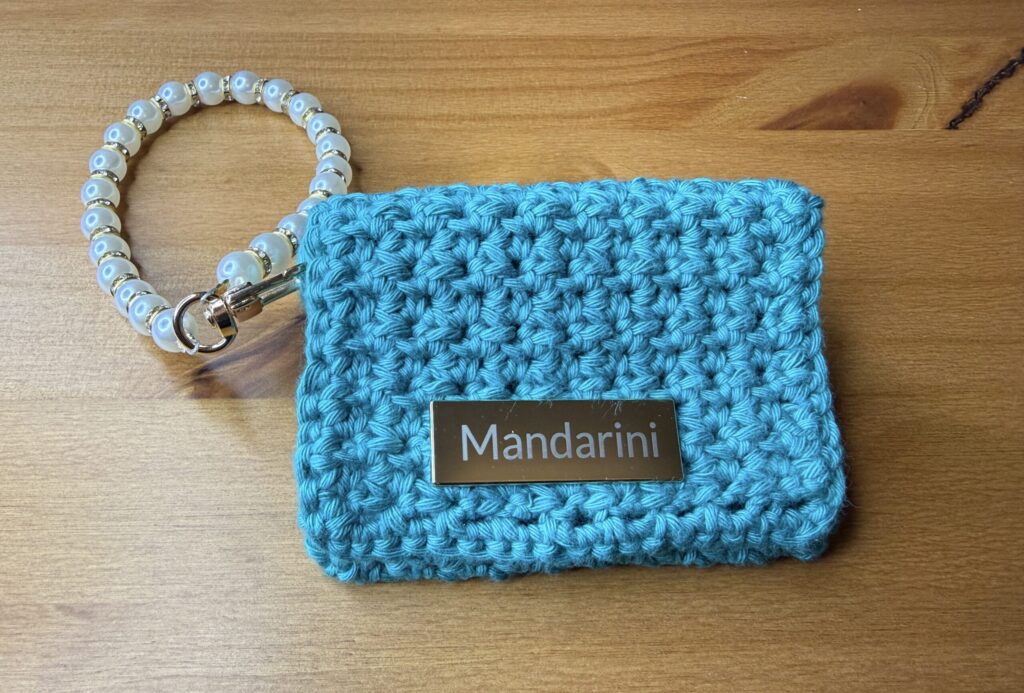
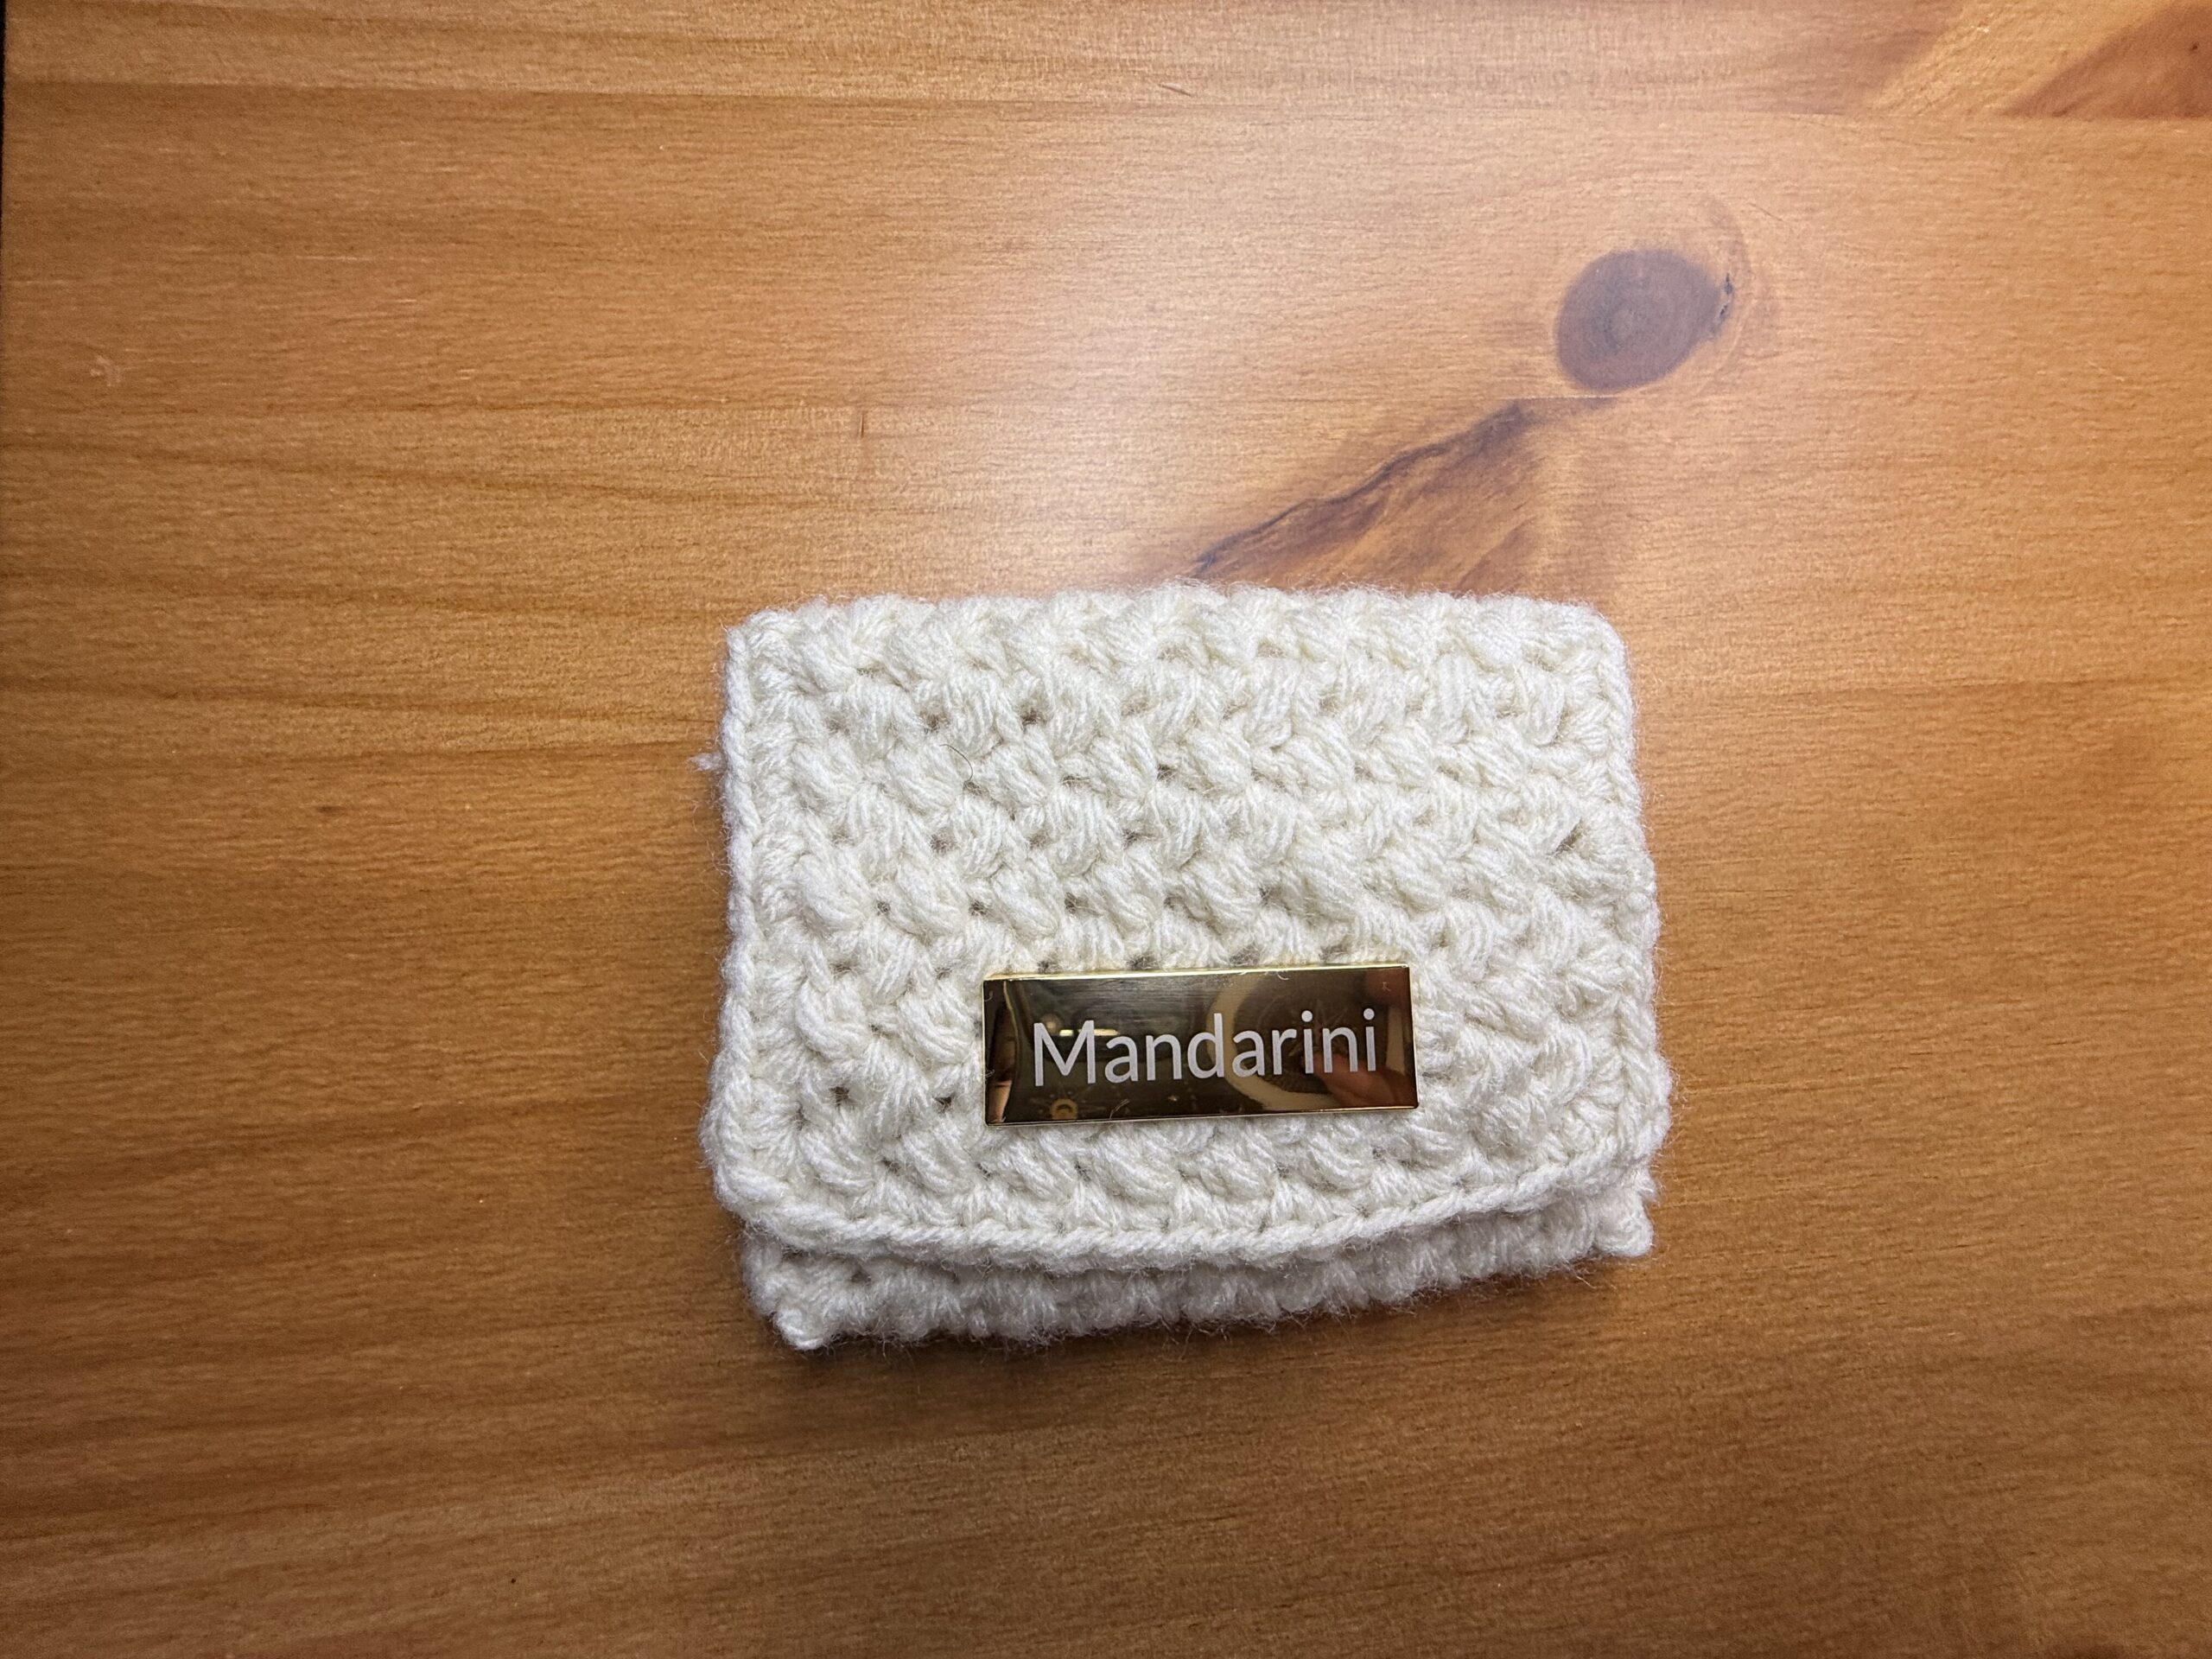
I think this is the cutest little crochet card holder to give as a gift for any occasion. If you decide to add gold hardware, the gift instantly becomes a luxury gift for cheap!
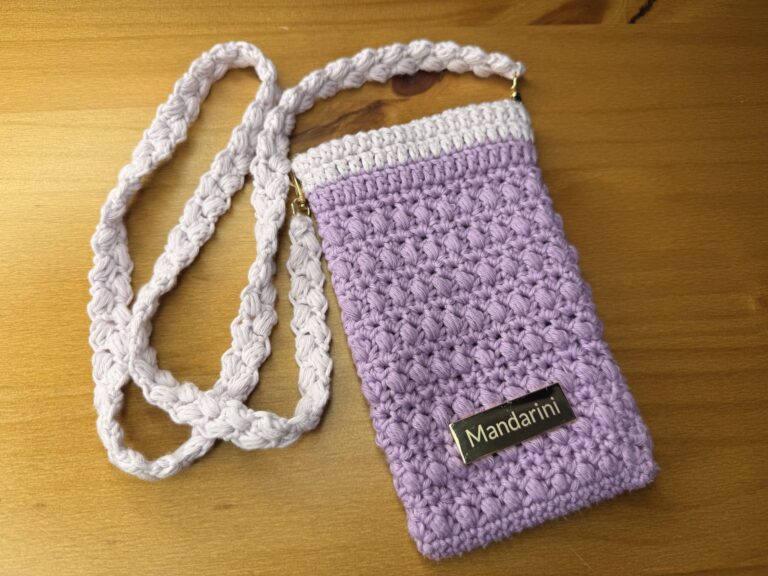
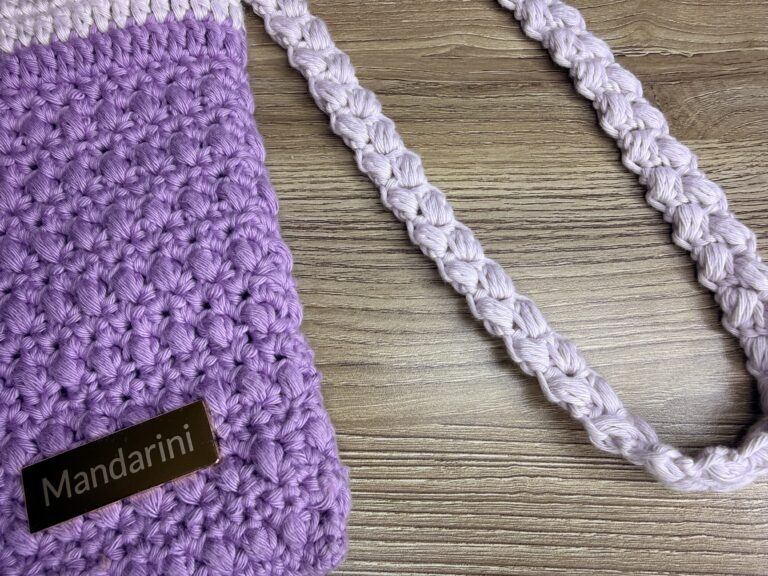
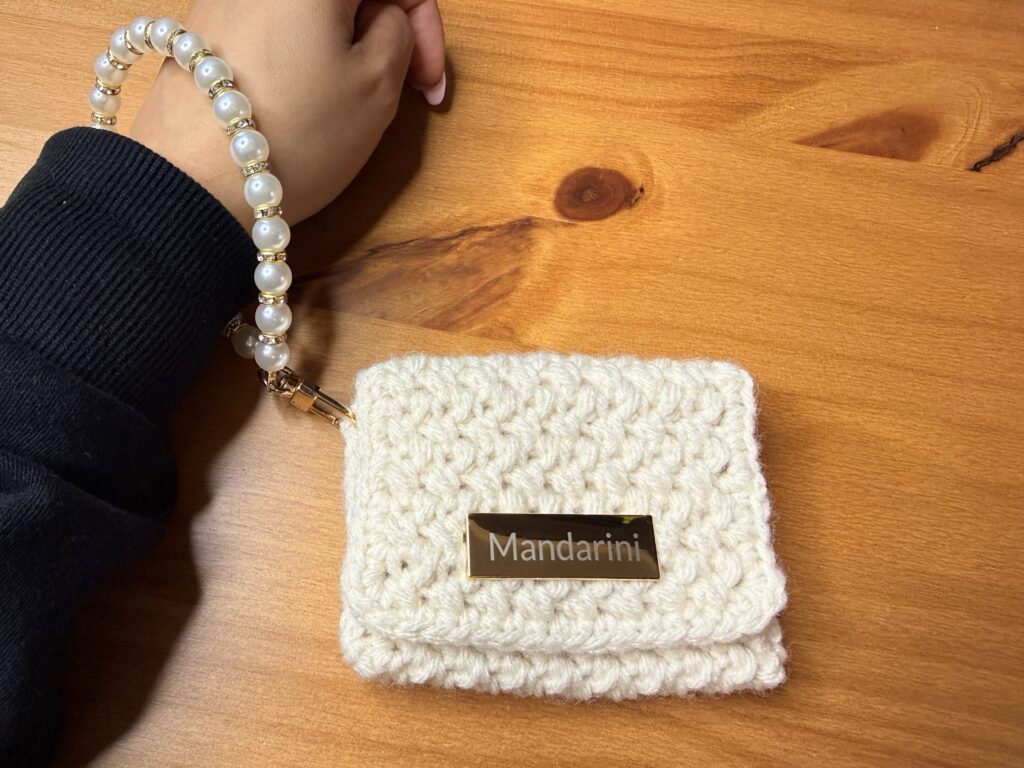
Pictured below: Easy Crochet Card Holder with Braided Crochet Wristlet.

Who doesn’t love to add to their cute bag collection? This crochet card holder is so simple and easy to make.
You only need to know three stitches to complete this crochet card holder pattern. This makes it a great project for beginners and those looking to practice basic stitches.
I decided to spice this simple pattern up with some customized hardware that I received off of Amazon. You can choose to crochet a cute bow or other design to cover up the back of the magnetic closure.
Supplies for Easy Crochet Card Holder
- Worsted Weight Cotton Yarn – You can use other yarn types, but you’ll want to make sure it has a bit of weight to it.
- 4mm crochet hook
- 14mm magnetic snap button
- stitch marker
- tapestry needle
Optional
- Gold branded hardware
Abbreviations for Easy Crochet Card Holder
Ch – chain
ST – Stitch
SL ST – slip stitch
SC – single crochet
HDC – half double crochet
Crochet Card Holder Pattern
CH 19 to start
Row 1 – In the second chain from the loop, SC & HDC in the same ST. Skip one chain. SC & HDC in the next stitch. Repeat 9x. CH 1, then turn.
Row 2 through 34 – Skip first stitch. SC & HDC in every other stitch. CH 1 then turn.
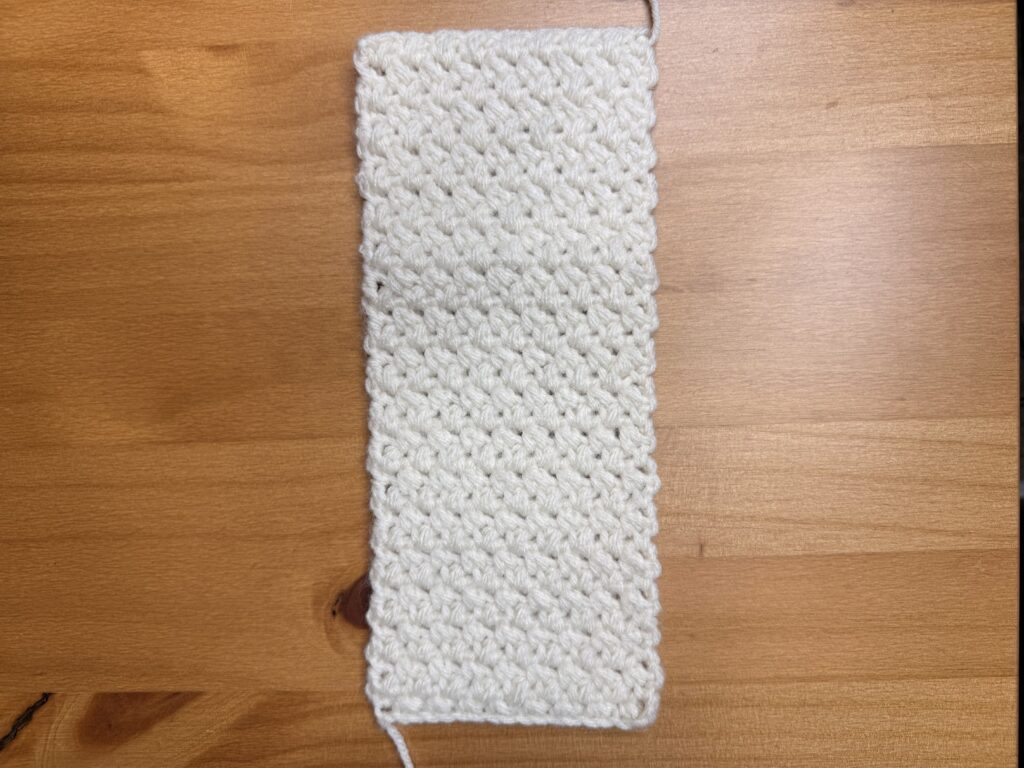
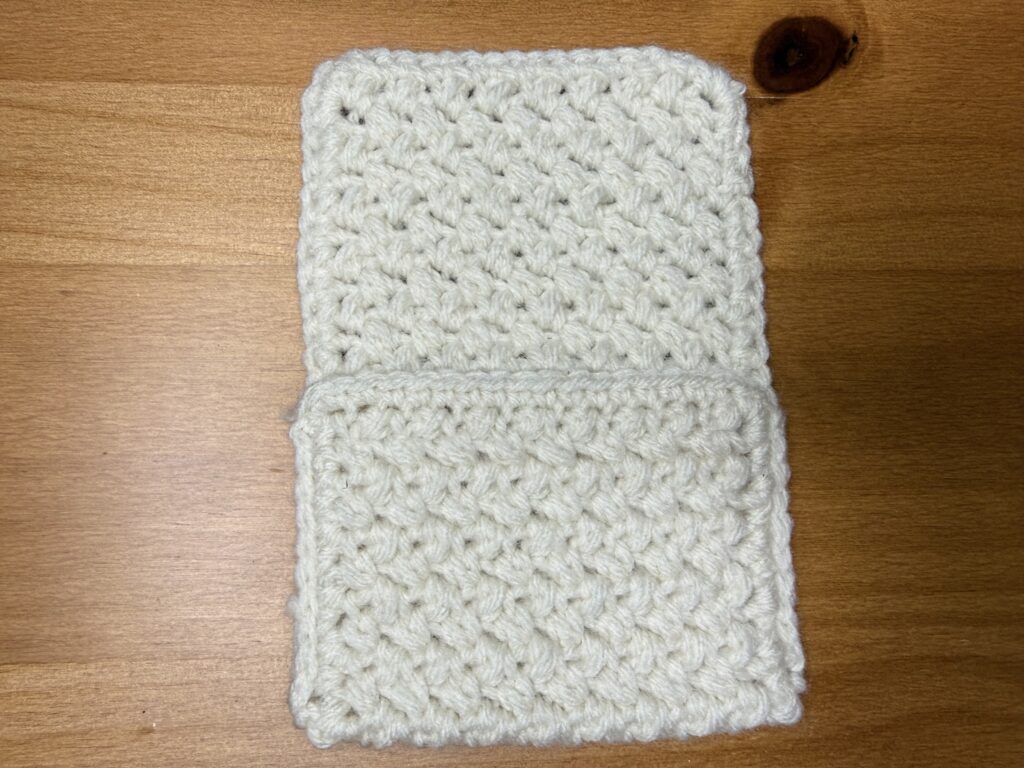
Now we are finished with the base of the pattern. To clean things up a bit and make it look like I recommend doing SC’s all around the pattern.
Personally, I like tying off the base pattern, then starting the single crochets all around on the side. Either way, you’ll want ot be sure to place 3 SC’s in all 4 corners to get that nice rounded look.
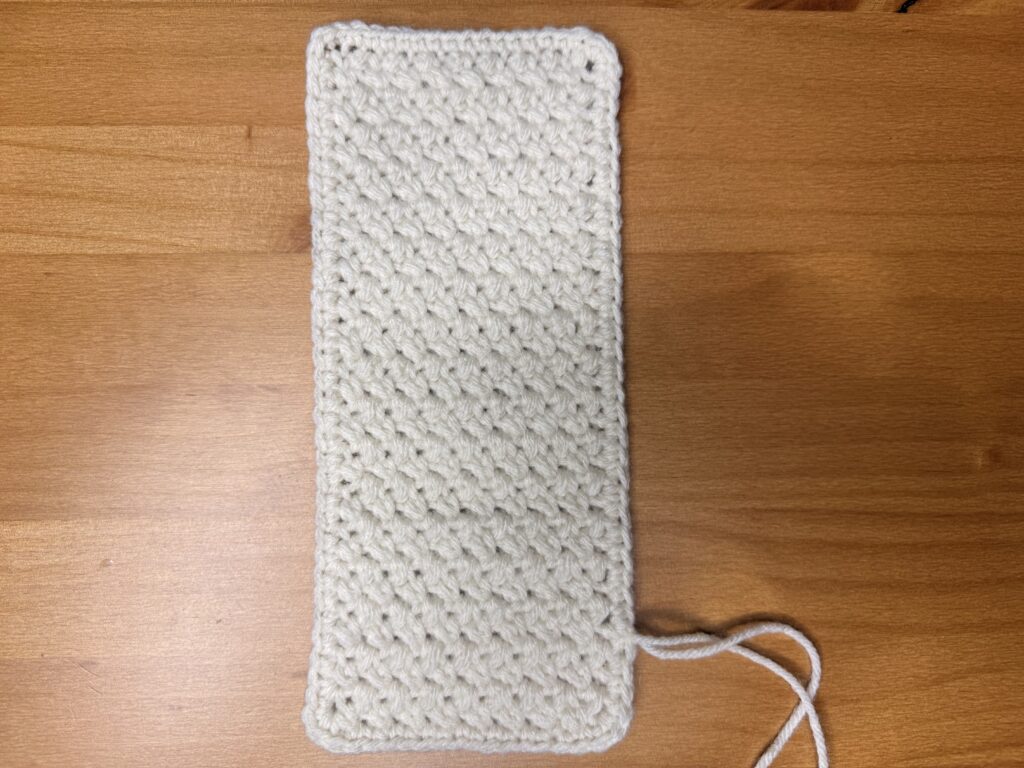
Next, you’ll want to fold up one end and SL ST the sides together, as shown in the image below.
I pretty much just eyeball this and separate it into 3 equal pieces so it will fold over completely.
Use a tapestry needle to sew in your ends if you haven’t already.
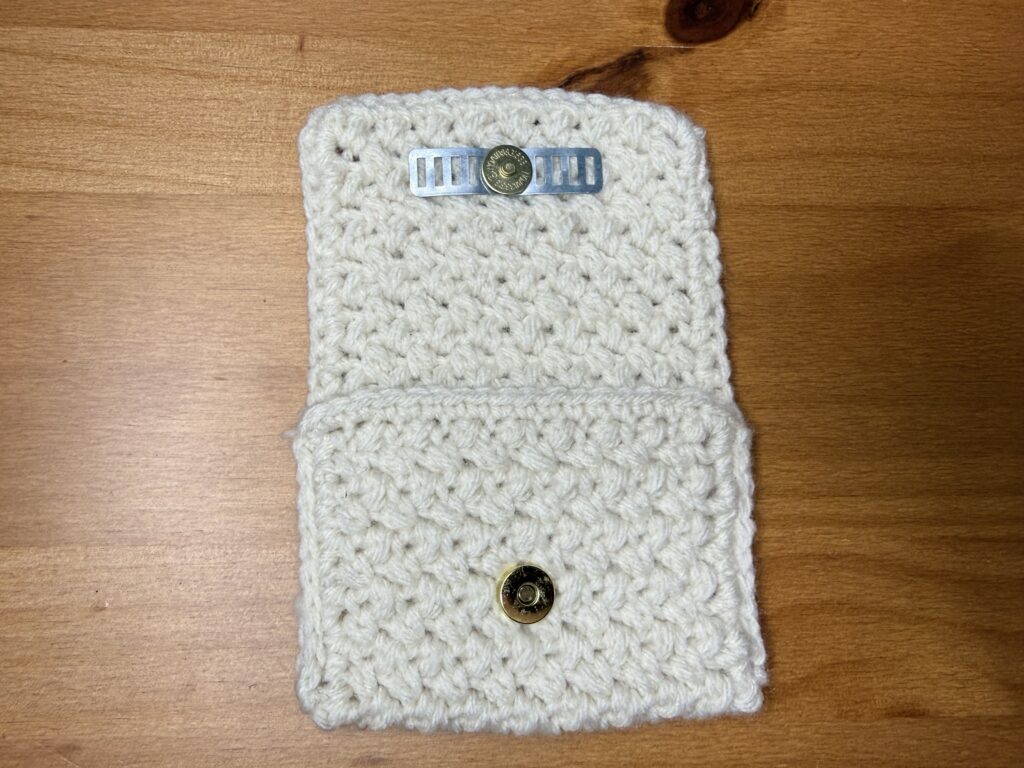
The final step is adding the magnetic button to close the card holder. I went with a 14mm magnetic button, but you can go up a size if you’d like.
If you are using branding hardware on your crochet card holder like I am, you’ll want to make sure to lace the back of the branding hardware behind the top magnetic button, as shown below.
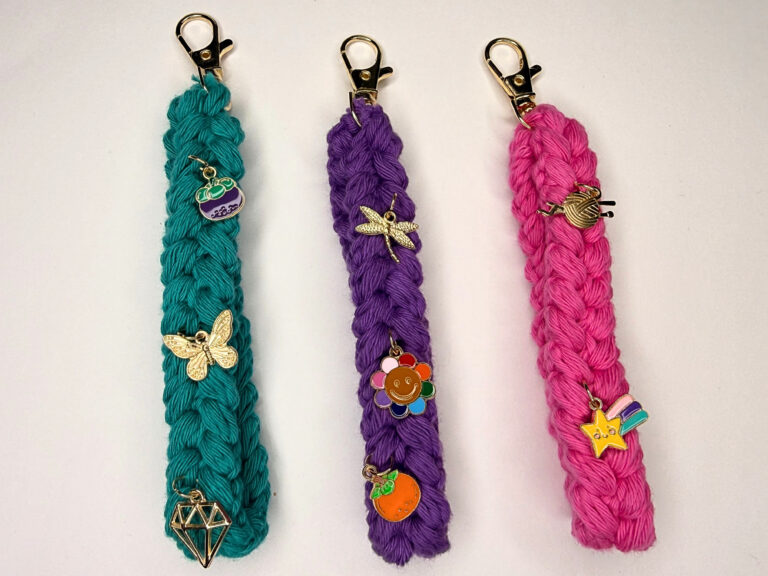
Finally, you’ll add a super cute wristlet to your design. I decided to go with more hardware, but you can also look at some other super cute free wristlet patterns on the site. I recommend this one!
I hope you enjoyed this super easy crochet card holder pattern!